
User journey maps
 Among the many tasks involved in discovery phase is user journey mapping. This tends to answer the question “how will your product’s user achieve the core goals of your product”. In this piece, we will get to understand what user journey mapping means, why it’s important to do, how it’s done and sampling of the best user flow design tools highly recommended by UX designers.
User journey mapping is part of product discovery phase that aims to visually depict a target user’s walk through a product. It’s a visual representation of a selected persona exploring a product in a clear and logical path until their goal is met. It outlines the entry points, processes, decision making, actions, outputs and exit points of a product solution with a keen focus on the pain points, joy, feelings, questions and the general user experience of the product.
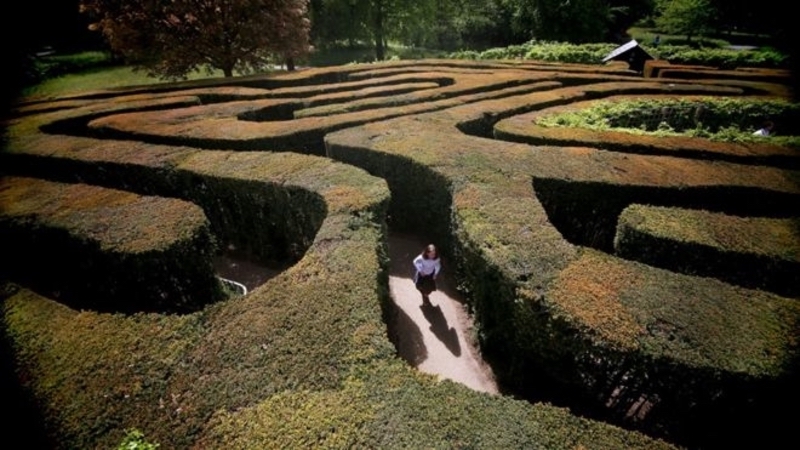
Here’s an example of the user journey through a website:
It’s also used to provide a high-level communication to product stakeholders on how the user really makes his way through the product solution, therefore helping the stakeholders understand the flow from the user’s point of view.
Here are some elements that makes the user journey:
Entry Points
What’s the first thing an end user does when they discover a product? Well, this is your persona’s entry point. This is the point that engages the user to the product’s functionality. If you want to keep your end user, you neeed to focus here. Pay attention to the look and feel of your entry point, focus on things like the speed of loading up the product, color schemes, arrangement of your product components - for example always placing login on top of your landing page or make it more visible if it’s somewhere else. You don’t want to get your user frustrated on the very first stop. There’s lots to be considered. The trick is to think like a marketer focusing on window shoppers - the goal would be to convert a window shopper.
Processes
This is now the real juice of your product. They represent the actual actions that an end user performs with hopes of getting to the end, for example the actions that would lead your user in buying an item from an online shop. Keep them clear, logical and engaging. Make them appear as if there’s a virtual user talking to your end user. Focus on the end users experiences, feelings and perceptions relative to their needs and goals while going through the processes. The simple and clear actions really determine the conversion of a user.
You can optionally provide chronological guides that would help your end user in browsing through the product easily. Wizards and tracker are great for this.
Decision making and loops
These are the cyclic engagements of the user while taking actions on the product. They represent the various options available to a user in taking certain actions. They can be really useful in cases where a user is caught up in seemingly un-ending decision making. This can illuminate the product designers decision to escalate the user’s frustration into ‘critical level’ and assign the user to customer support for a more direct and personal help.
Outputs
These are the messages the user gets after taking a certain action. They include either success messages or error messages. In either case, the output should be clear and informative to avoid user confusion.
Exit Point
They represent the final point of your user’s journey. At this point, always ensure that the user’s goal has been accomplished. This will really determine whether the user makes a revisit to the product or not.
Always keep in mind that a user’s journey continues even after accomplishing a task and exiting the product. The tendency is that a user would recommend the product to others or not.
How is it done?
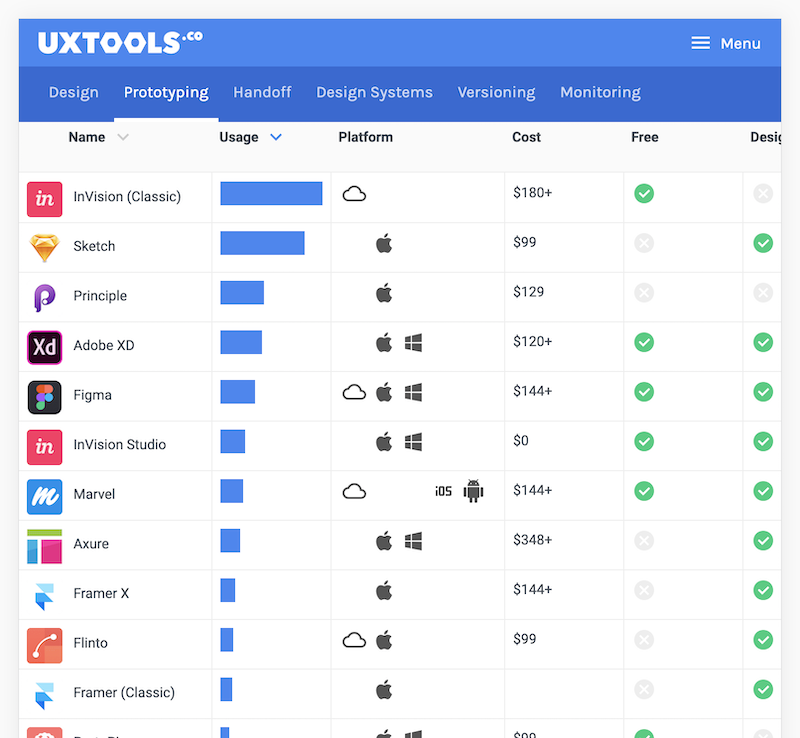
With the advent of technology and simple look up on the internet, you’ll come across various design tools used. From my UX design experience and research on top design tools used by UX designers, Sketch, Lucid chart, creately, InVision and Marvel top the list of the best UX design tools.
However, don’t jump right into the online tools. First, make a research on the user’s needs, perceptions and pain points in accomplishing a goal. You can also map out a similar product’s user journey during your research if it proves to be more revealing about a user’s needs, perception and pain points. Look into what keeps users sticky, observe the mechanisms used in achieving great user experience and much more. Doing the research will really help you in understanding the user well, what a user does inorder to accomplish a goal, a user’s happy moments and more leading to mapping out the user journey perfectly. The more you understand the journey, the higher the chances of designing a perfect user journey.
Then, sketch out the flows on paper before prototyping then onto your favorite digital design tool. Having the sketches on a piece of paper or on sticky notes makes it easy to change the designs before transfering the final designs to a design tool.
To make the process simple, I have it broken down to these sub-processes:
-
Identify your persona
This is your target end user. According to your product, map out and organize your persona according to age, location, gender, goals, devices in use etc.
-
Define your persona goal
This answers the question what does my target user want? For example, To Send money to My Contacts, if you are building a digital money transfer app.
-
Define the processes and actions
These are the specific actions or steps the user would take to meet a certain goal.
-
Define the user flow.
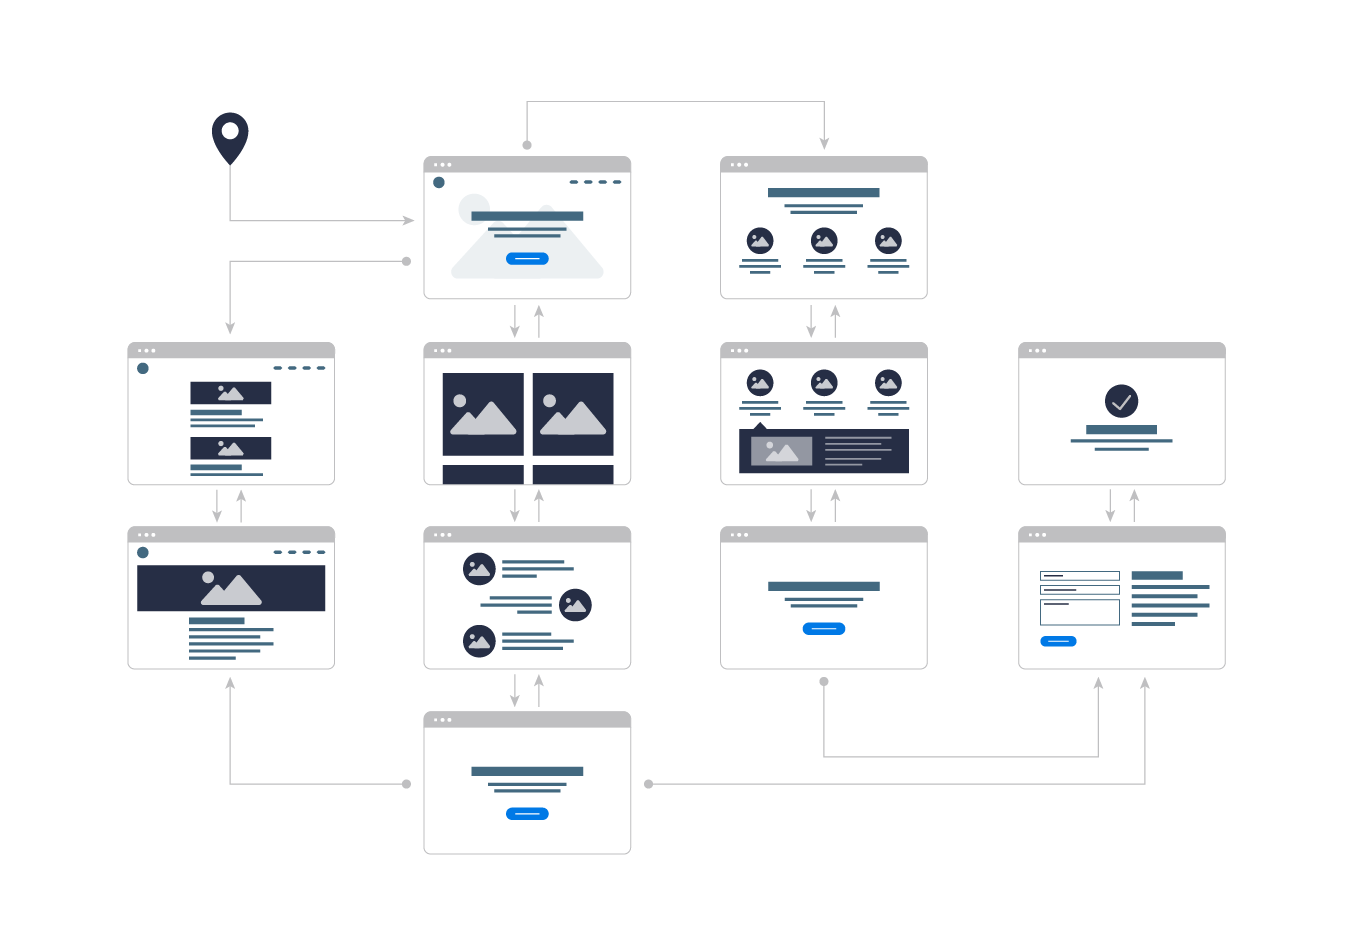
Draw out the user processes into a logical user flow diagram that shows the process flow from beginning to the end. Always keep in mind the scope of your goal to ensure that the users go through less steps decision making and actions in meeting their goals. Reduce choice as much as possible.
-
Draw the wireflows and mockups.
From the user flow defined in the previous step, draw out wireframes and mockups for the specific processes and actions. These are replicas of the end product. They will help in validating the user journey visually and determine whether it needs optimization or not.
-
Build prototypes or dummy demos
This will create a visual narrative of the end product. It will help bring out the feel of the actual product and how the user will actually use the product in meeting his goals.
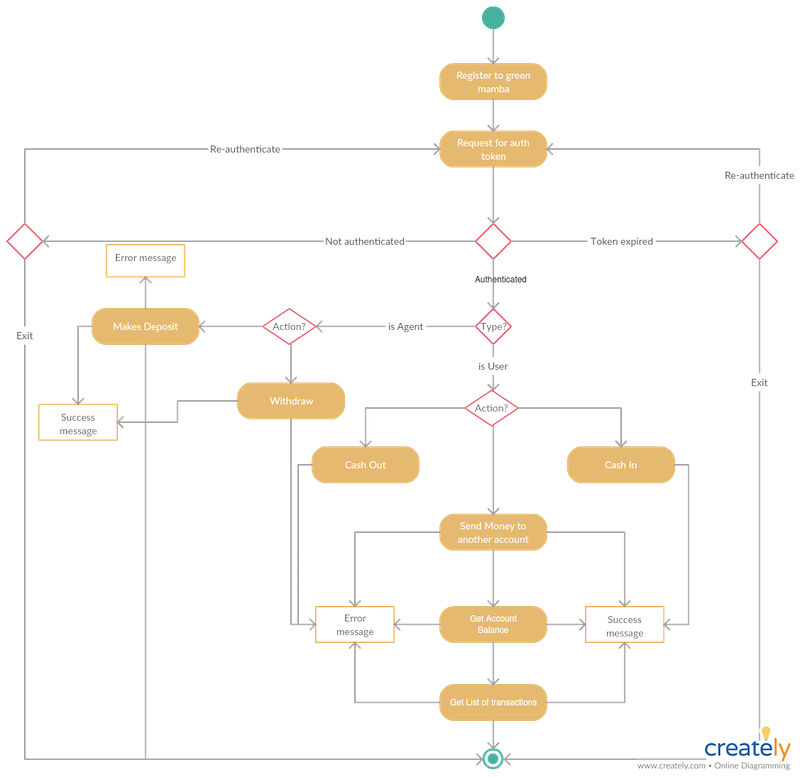
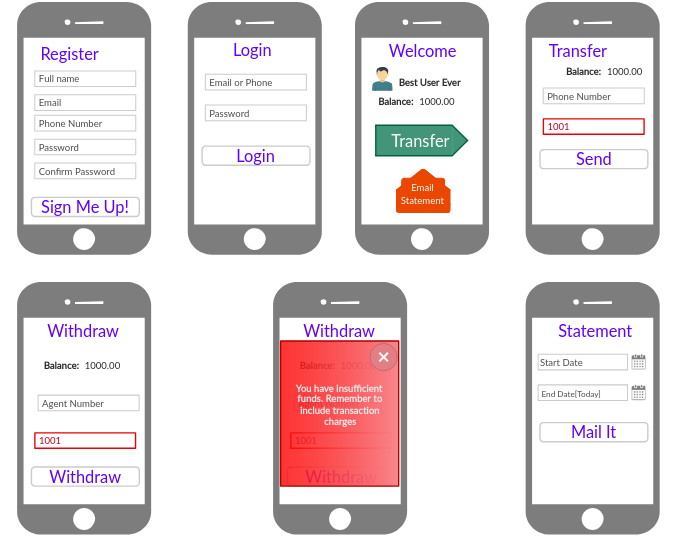
Here is an example prototyped User Journey done in InVision
Overall, in order to create a great user journey
- keep it simple
- see it through your user’s eyes
- keep it goal specific
- ensure it has all the important details needed
- ensure you use conventional diagrams in creating the designs
…because the point is to always provide the shortest and simplest path from point A to Z for your end user.